As part of my efforts to revitalize my blog, it occurred to me that I have enough people accessing my site that I really didn’t want to mess up the actual pages when I mess something up. And let’s face it, if you muck about with HTML, PHP and CSS theme files enough, you’ll eventually land yourself into a situation where something is broken and it might take a few hours to fix. During that time is when, knowing my luck, Google or Yahoo will attempt to crawl my site looking for content. Or, even worse, a reader will look at my site, and leave since they can’t read the content. This is a bad situation.
Local LAMP Server
The solution to this is having the ability to develop your website off-line. Essentially, have your own, local server where can muck about till your heart is content without affecting any readers experience. For WordPress development, you’ll need a LAMP server (Linux, Apache, mySQL and PHP). If you’re starting from scratch with your Linux install, you could simply install a Linux Server version. Please be aware that a server install will not come packaged with a nice graphical user interface. Starting with an existing workstation install, it’s a bit more difficult. Ubuntu has attempted to make it as easy as possible by creating what they call “tasks” which are essentially meta packages containing what you need for a specific type of installation. This allows the Lamp Server task to be installed on top of your existing workstation installation. Since I wanted to be able to use my Ubuntu box as normal, but have the LAMP stack available, this is what I did.
Ubuntu 9.04 Jaunty LAMP Installation
Using the above “tasks” system, the following command, executed from the command line will do the trick!
sudo apt-get install lamp-server^
According to the Ubuntu Documentation, the ‘^’ is essential.
In the middle of the installation, you will be asked to set a root password for your SQL installation. Pick whatever you want, but do ensure it’s something that you can remember!
After grinding away for a bit, it should finish and you should have a fully functional server on your machine.
Testing Apache Installation
The first thing to do is to test your Apache installation. Apache is the web server and is responsible for serving up http requests to your browser. To test it, simply navigate a web browser to http://localhost/. It should look like the following image.
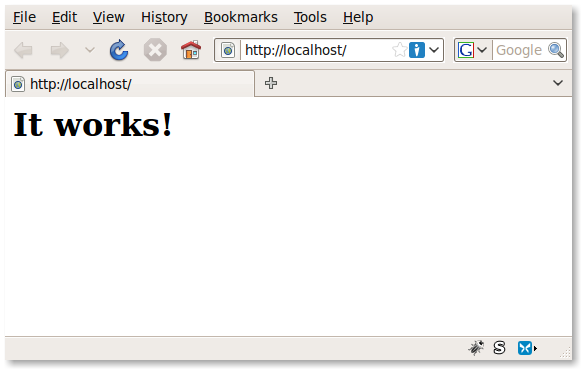
This would be the default response from the Apache server. Congratulations — your Apache works!
Testing PHP Installation
For those unfamiliar, PHP is a scripting language designed to create dynamic web content. PHP is necessary for developing WordPress themes and plugins. In fact, WordPress uses a MySQL server to store data (posts, comments, etc…) and creates the dynamic pages the user sees using PHP.
In order to test your local PHP install, it is necessary to create a simple .php file. From a terminal window, execute the following command:
gksudo gedit /var/www/testing.php
Since you’re trying to write something to a administrative area, you’ll be asked for your root password. Once you have the file open, insert the following line of PHP code and save it.
<?php phpinfo(); >
Back at the terminal prompt, restart the Apache server by running the following:
sudo /etc/init.d/apache2 restart
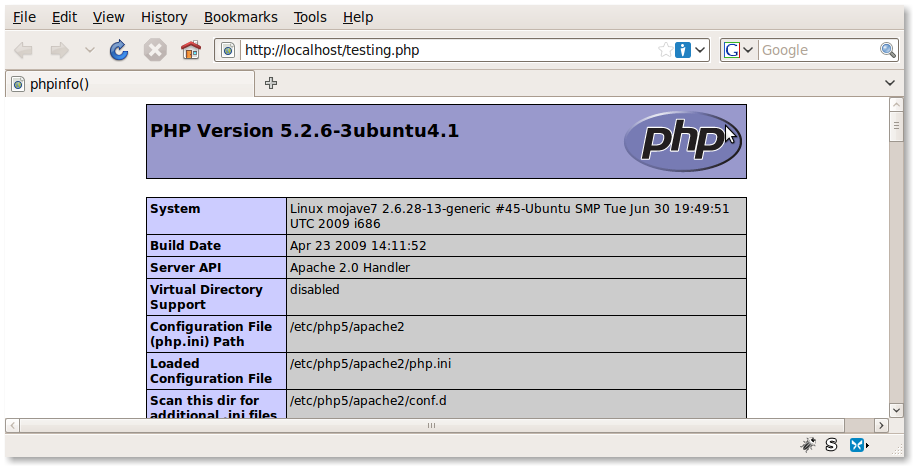
Back in your browser window, navigate to http://localhost/testing.php. You should see a window similar to the following:
Still with me? If so, you’re good to go and can install WordPress locally and begin developing!